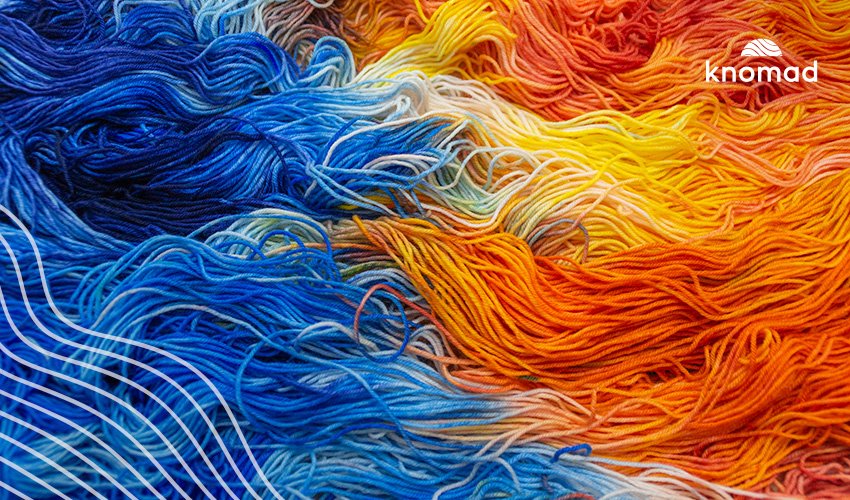
How to dye undyed yarn: Vibrant Ocean Sunset on SNOWDRIFT
Bold summer sunsets at the ocean are one of my favorite sights. The sky looks...

Indigo is often one of the first natural dyes we have a chance to try. Set up at a fibre festival, a workshop or local art studio, a dye artist prepares the vat and materials ahead of time: all you need to do is dip! Before trying this experiment, this was the only way I had used indigo dye–someone else had set up the vats for me. As I got deeper and deeper into knowledge about natural dyeing, I knew that indigo was something I wanted to try, but it was chemically more complicated than working with flowers or collected materials.
When Knomad asked that I share a post on indigo, I had no idea what I was getting into! The process is a lot more work than my typical dye bath setup, and if you’re able to enlist some friends to help you, that can make it less labor intensive and more fun. You’ll need at least 1 full day to dedicate to dyeing, and a space where you can put down some tarps or trays under your in-progress dye goods. Good ventilation is an absolute must, too.
Indigo dye vats can be prepared a few different ways, but I decided that for my first time out, the easiest might be best. I read a few different tutorials and quickly discovered that the best way to dip your toes in is the ‘1-2-3 Indigo Vat’, or the Fructose Vat, first popularized by Michael Garcia. This vat is created by using a simple formula and three ingredients.
If you enjoy reading through this very simple version, please take the time to watch some other indigo videos and read tutorials online from other natural dyers–there is so much nuance to indigo that I don’t feel comfortable being your primary source on the subject! We can expand our knowledge about this awesome dye together.
How to Naturally Dye Wool with Indigo
Materials
For this dye experiment, you’ll want the following materials on hand. Remember, anything you use for natural dyeing must not be used again for food or food prep at any time, and you’ll want to store it separately to avoid any cross-contamination.
*These items have been pre-calculated in the amount you need for this project, dyeing 400 g of wool, however, you can also do your own calculations using the guide below.
A note before you begin! This whole process takes between 8-12 hours. I did my indigo dyeing in one full day. It is possible to make your vat, save it overnight and re-heat it the next day (read how to do this at the end of the tutorial).
Indigo prep requires that you know the volume of the water you’ll be using to create your bath. Remember–you need enough so that two skeins of yarn can move comfortably around without touching the bottom too frequently. You’ll also want to add more water than you typically would since you’ll be pulling water out with every dip–and you’ll be dipping each skein multiple times.
Calculate how much water you’ll be using. I added 16 cups (4L) of water to my stock pot. My stock pot luckily has numbers on the side, but if yours does not, you can use a large measuring cup to measure water as you add it to the pot. It is important to know your volume!
Then, determine your desired shade(s) of indigo and concentration. Know going in that you’ll need to do a lot of individual dips to build up color. 3 dips is the minimum, to get a very pale blue. 10 dips is supposed to give you deeper tones in high-concentration baths. If you want to achieve a few different levels of color, plan on a higher concentration and dip your lighter items fewer times.
I decided to go with a 8g concentration of indigo–this means 6g of indigo per 1L of water. Since I had 4L of water, I needed to measure out 24g of indigo. From here, I can calculate the other parts of the vat:
Calcium Hydroxide is 2 x the weight of indigo: 48 g
Fructose is 3 x the weight of indigo: 72 g
Measure each of these out carefully on your scale, wearing a respirator and working outside if possible (or in a well-ventilated area).
Indigo needs a little time to absorb water, so you want to wet it early with hot water. I used my tea kettle and a glass jar to mix the two together, then screwed on the lid and wore my rubber gloves while shaking it. The jar will be very hot, so don’t try to touch it with your hands, just shake it with a glove on, every few moments until it stops looking grainy.
While your indigo is dissolving, heat your water to just under a simmer–around 180F. I can usually tell when it’s ‘just right’ by the amount of steam coming off the surface of the water.
Add your fructose into the water and stir to dissolve (it should happen very quickly since the water is so hot).
Add your calcium hydroxide to the water and stir it to dissolve. This is more of a powder, so try not to dump it all at once or it will puff up–instead, add just a little bit at a time as you stir it in (or have a friend help you). This will transform the color of the bath from clear to a milky white and then milky yellow color.
Add your indigo last, taking care to get every last bit into the pot. Stir gently, continually, for 2-3 minutes. You’ll start to see bubbles form on the top and then look kind of like blue pond scum–this is called the ‘flower’ and indicates that you’re almost done prepping the vat! Gently remove the spoon–from here, anything you bring in and out of the vat should be done slowly and gently, as disturbing the upper layer can add unwanted oxygen to the vat.
Over the next 30-45 minutes, watch the vat to make sure it does not boil (you want no movement on the surface at all, not even a simmer, or you’ll have to stir and reset). The surface should start to look like an oil slick from different angles, and if you slide a spoon gently into the surface, layer, you should see an amber-colored liquid beneath it. This means your vat has balanced.
If your amber liquid looks grainy or cloudy, stir and maintain for another 30 minutes. You may need to try this a few times–one of my vats took three stirring sessions to properly take! From here, turn off the heat. Your vat will need to cool a minimum of 4 hours so that you can dip things with your gloves on.
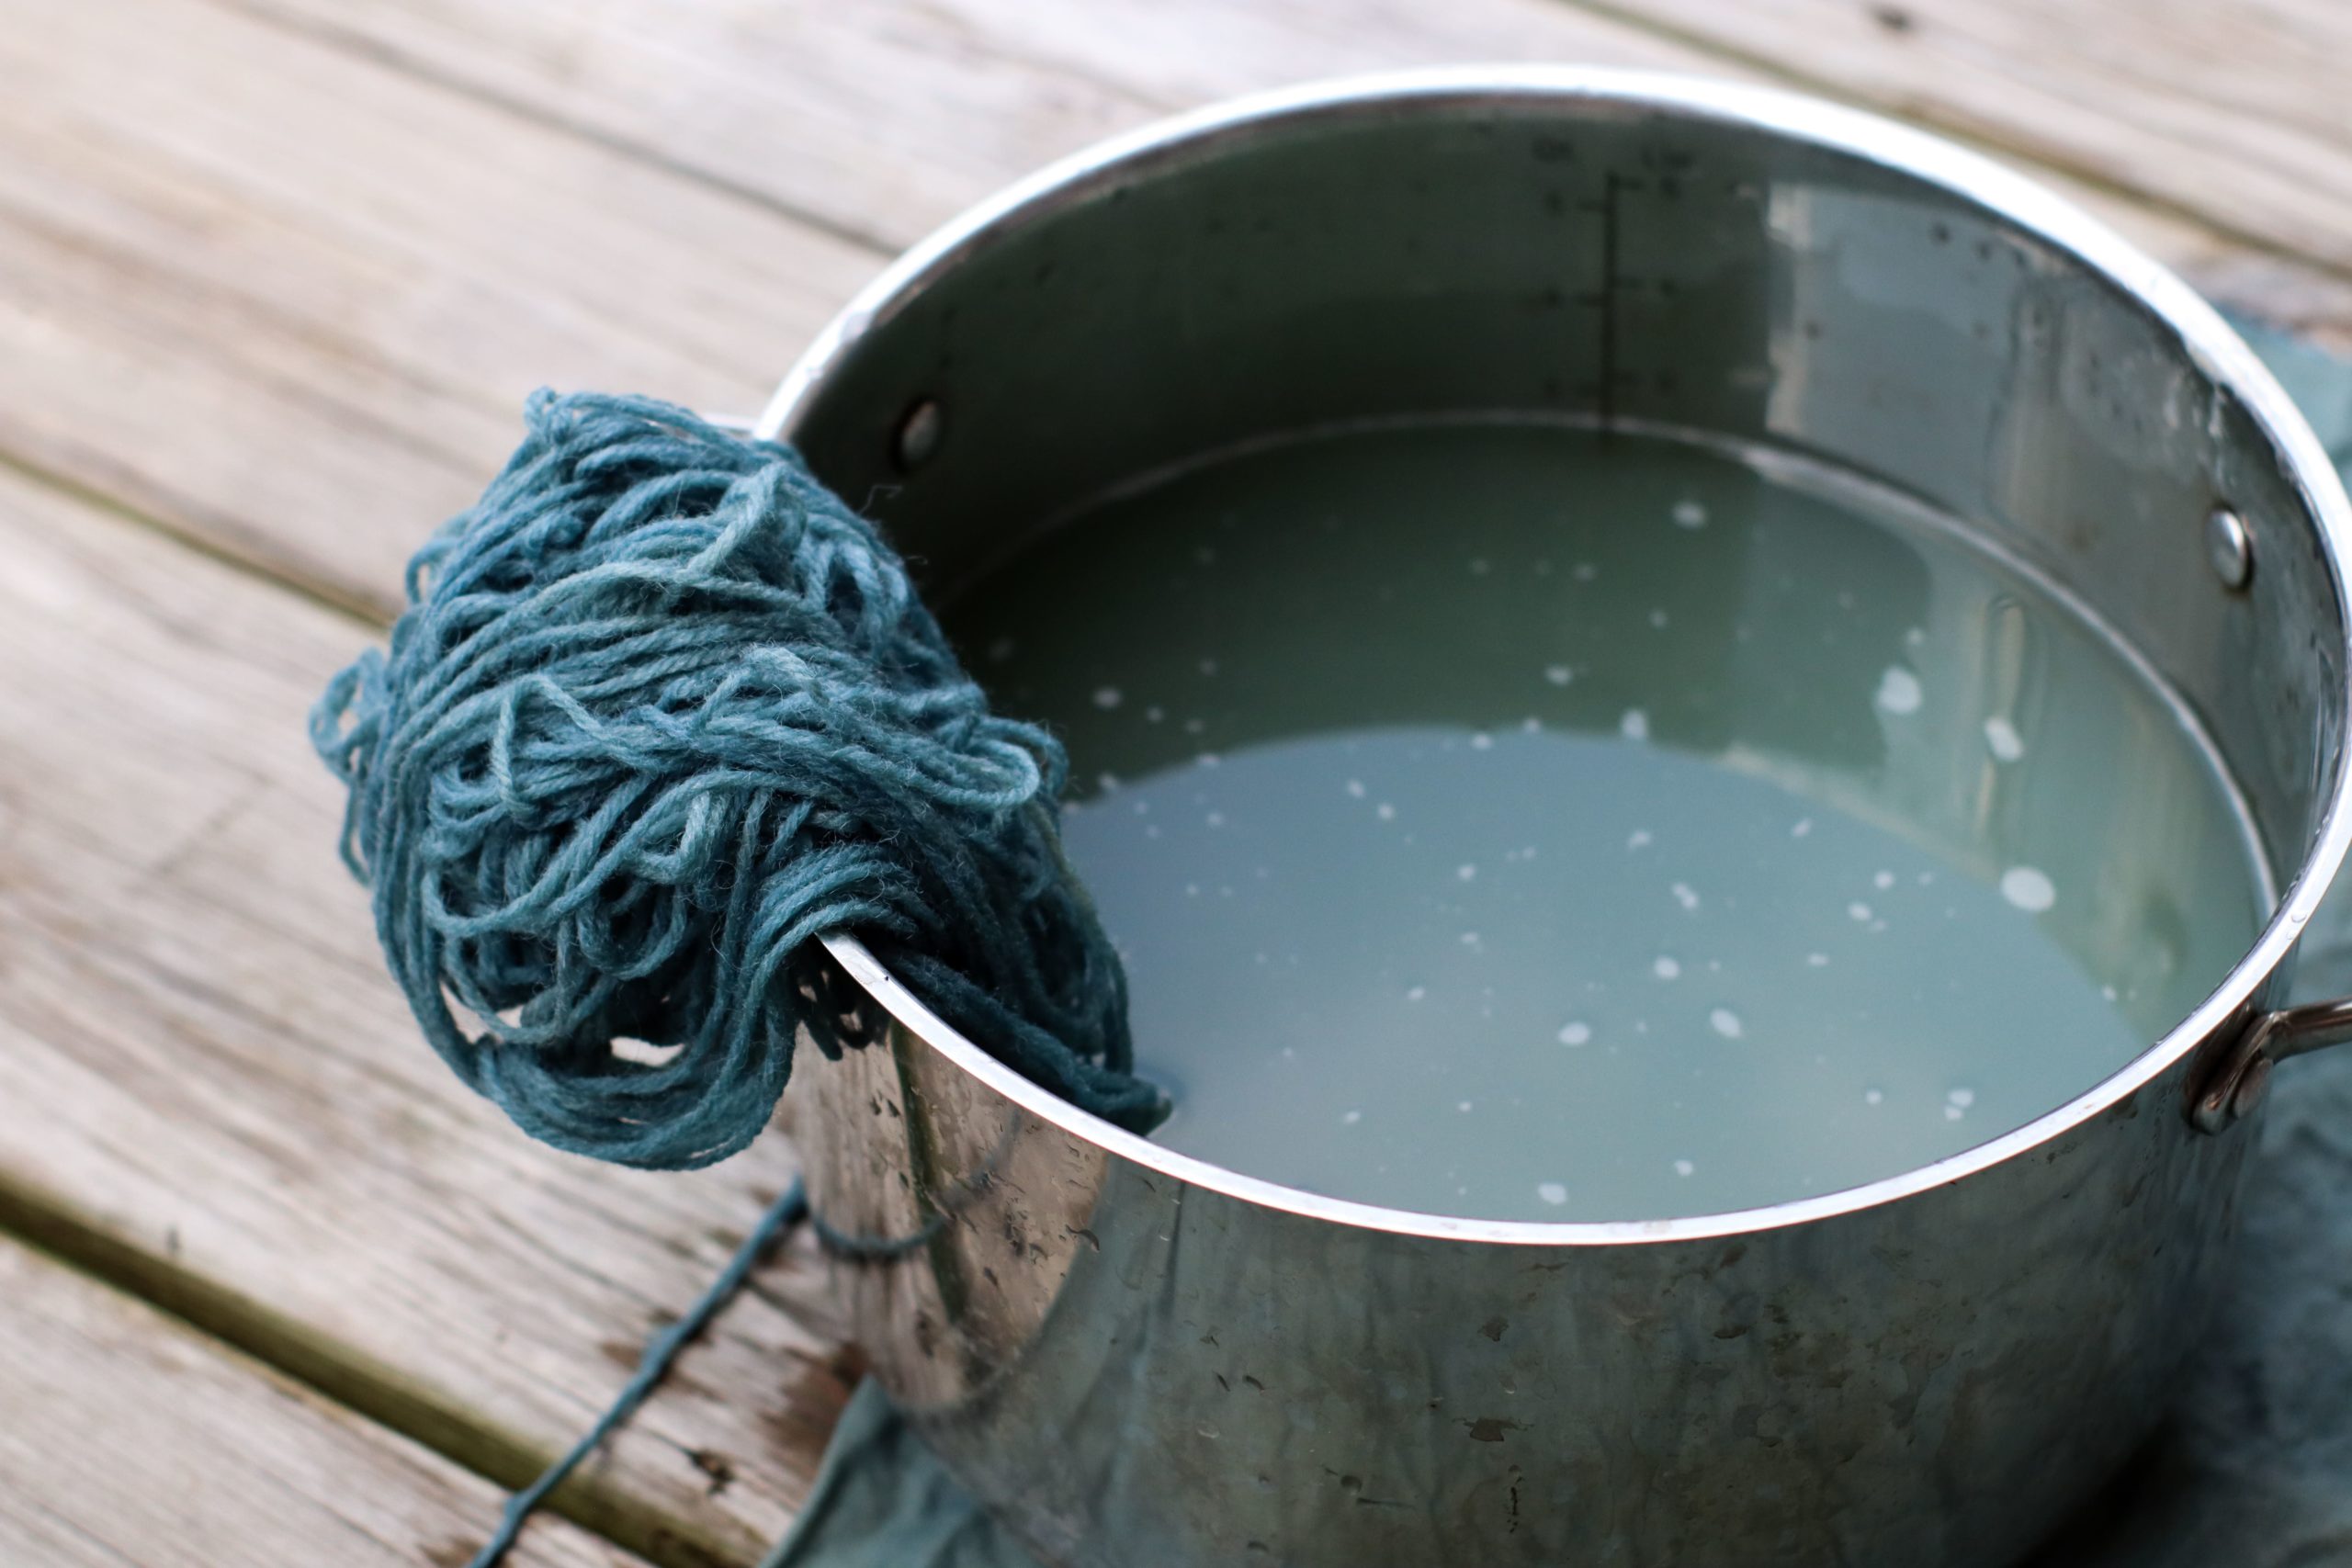
Knomad pre-scours and washes their yarns before shipping them to us, but indigo can be a little pickier than some other natural dyes. For more even coverage than what you’ll see on some samples here (dyed without additional scouring), you can do an additional round of scouring. In a separate pot, heat up water until it is just too hot for you to touch, then add a bit of wool soap, swishing to distribute it through the water. Add your yarn and keep it hot for 30 minutes, then turn off the heat. Don’t stir excessively, as it could felt your wool, but move the yarn around and then let it cool to the touch (you’ll have plenty of time to do this white your vat is cooling). When it’s cool enough to touch, strain out the water and add it to a clean hot water bath to rinse. It’s okay to keep the fibre warm–it will be warm while you’re dyeing, so we want to try and maintain as consistent a temperature as possible.
<IMAGE: 2274-18.jpg>
When your indigo is cool enough to dye, use a spoon to gently scrape the flower from the top layer of the vat. Be careful not to accidentally stir it! To make sure you’ll be able to handle the temperature, put on one of your gloves and dip your hand into the water. You’ll need to be able to hold the goods under the surface for a few moments, so if you’re uncomfortable, wait for it to cool down further before proceeding.
When you’re ready, dip one yarn at a time into the dye bath, gently lowering the skein below the surface and holding it under with your gloved hands for a full minute. You don’t want to allow the yarn to spend too much time on the bottom of the pot, or float out of the top layer, where it will begin to oxidize and change color.
When you’re ready to pull the yarn back out, gather it in your gloved hands under the surface and ball it up as small as you can without creating friction, then lift slowly, straight up, and move the yarn onto your tarp-covered area (or over your tray). Do your best not to drip into the vat.
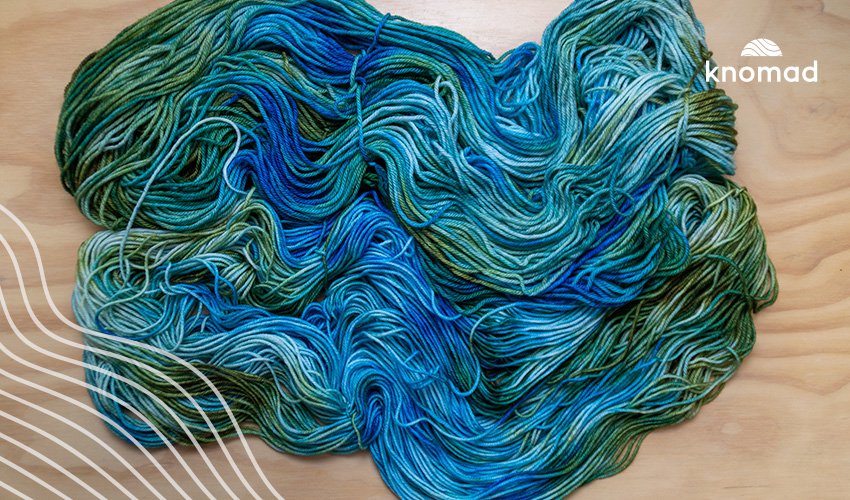
Hang your recently-dipped yarn on a drying rack to allow the oxygen in the air to come in contact with the indigo. It will magically transform from yellow to green to blue before your eyes! Use this transformation time to dip the next skein, and by the time you get back around to the first, it should be ready for a second dip!
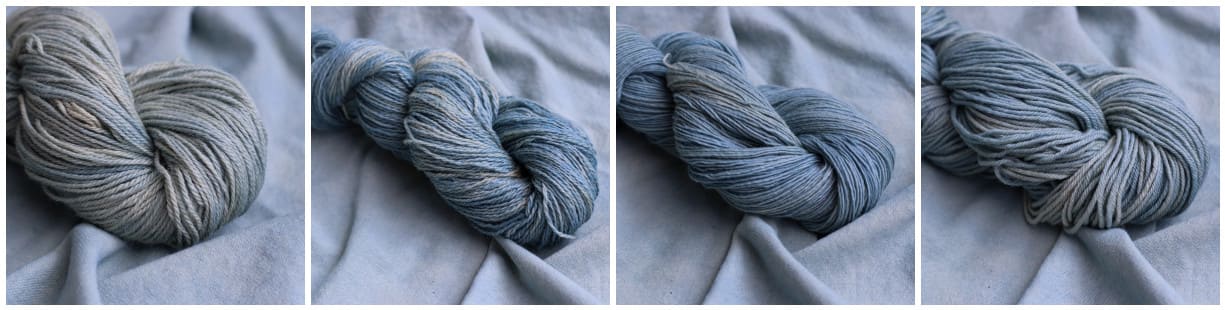
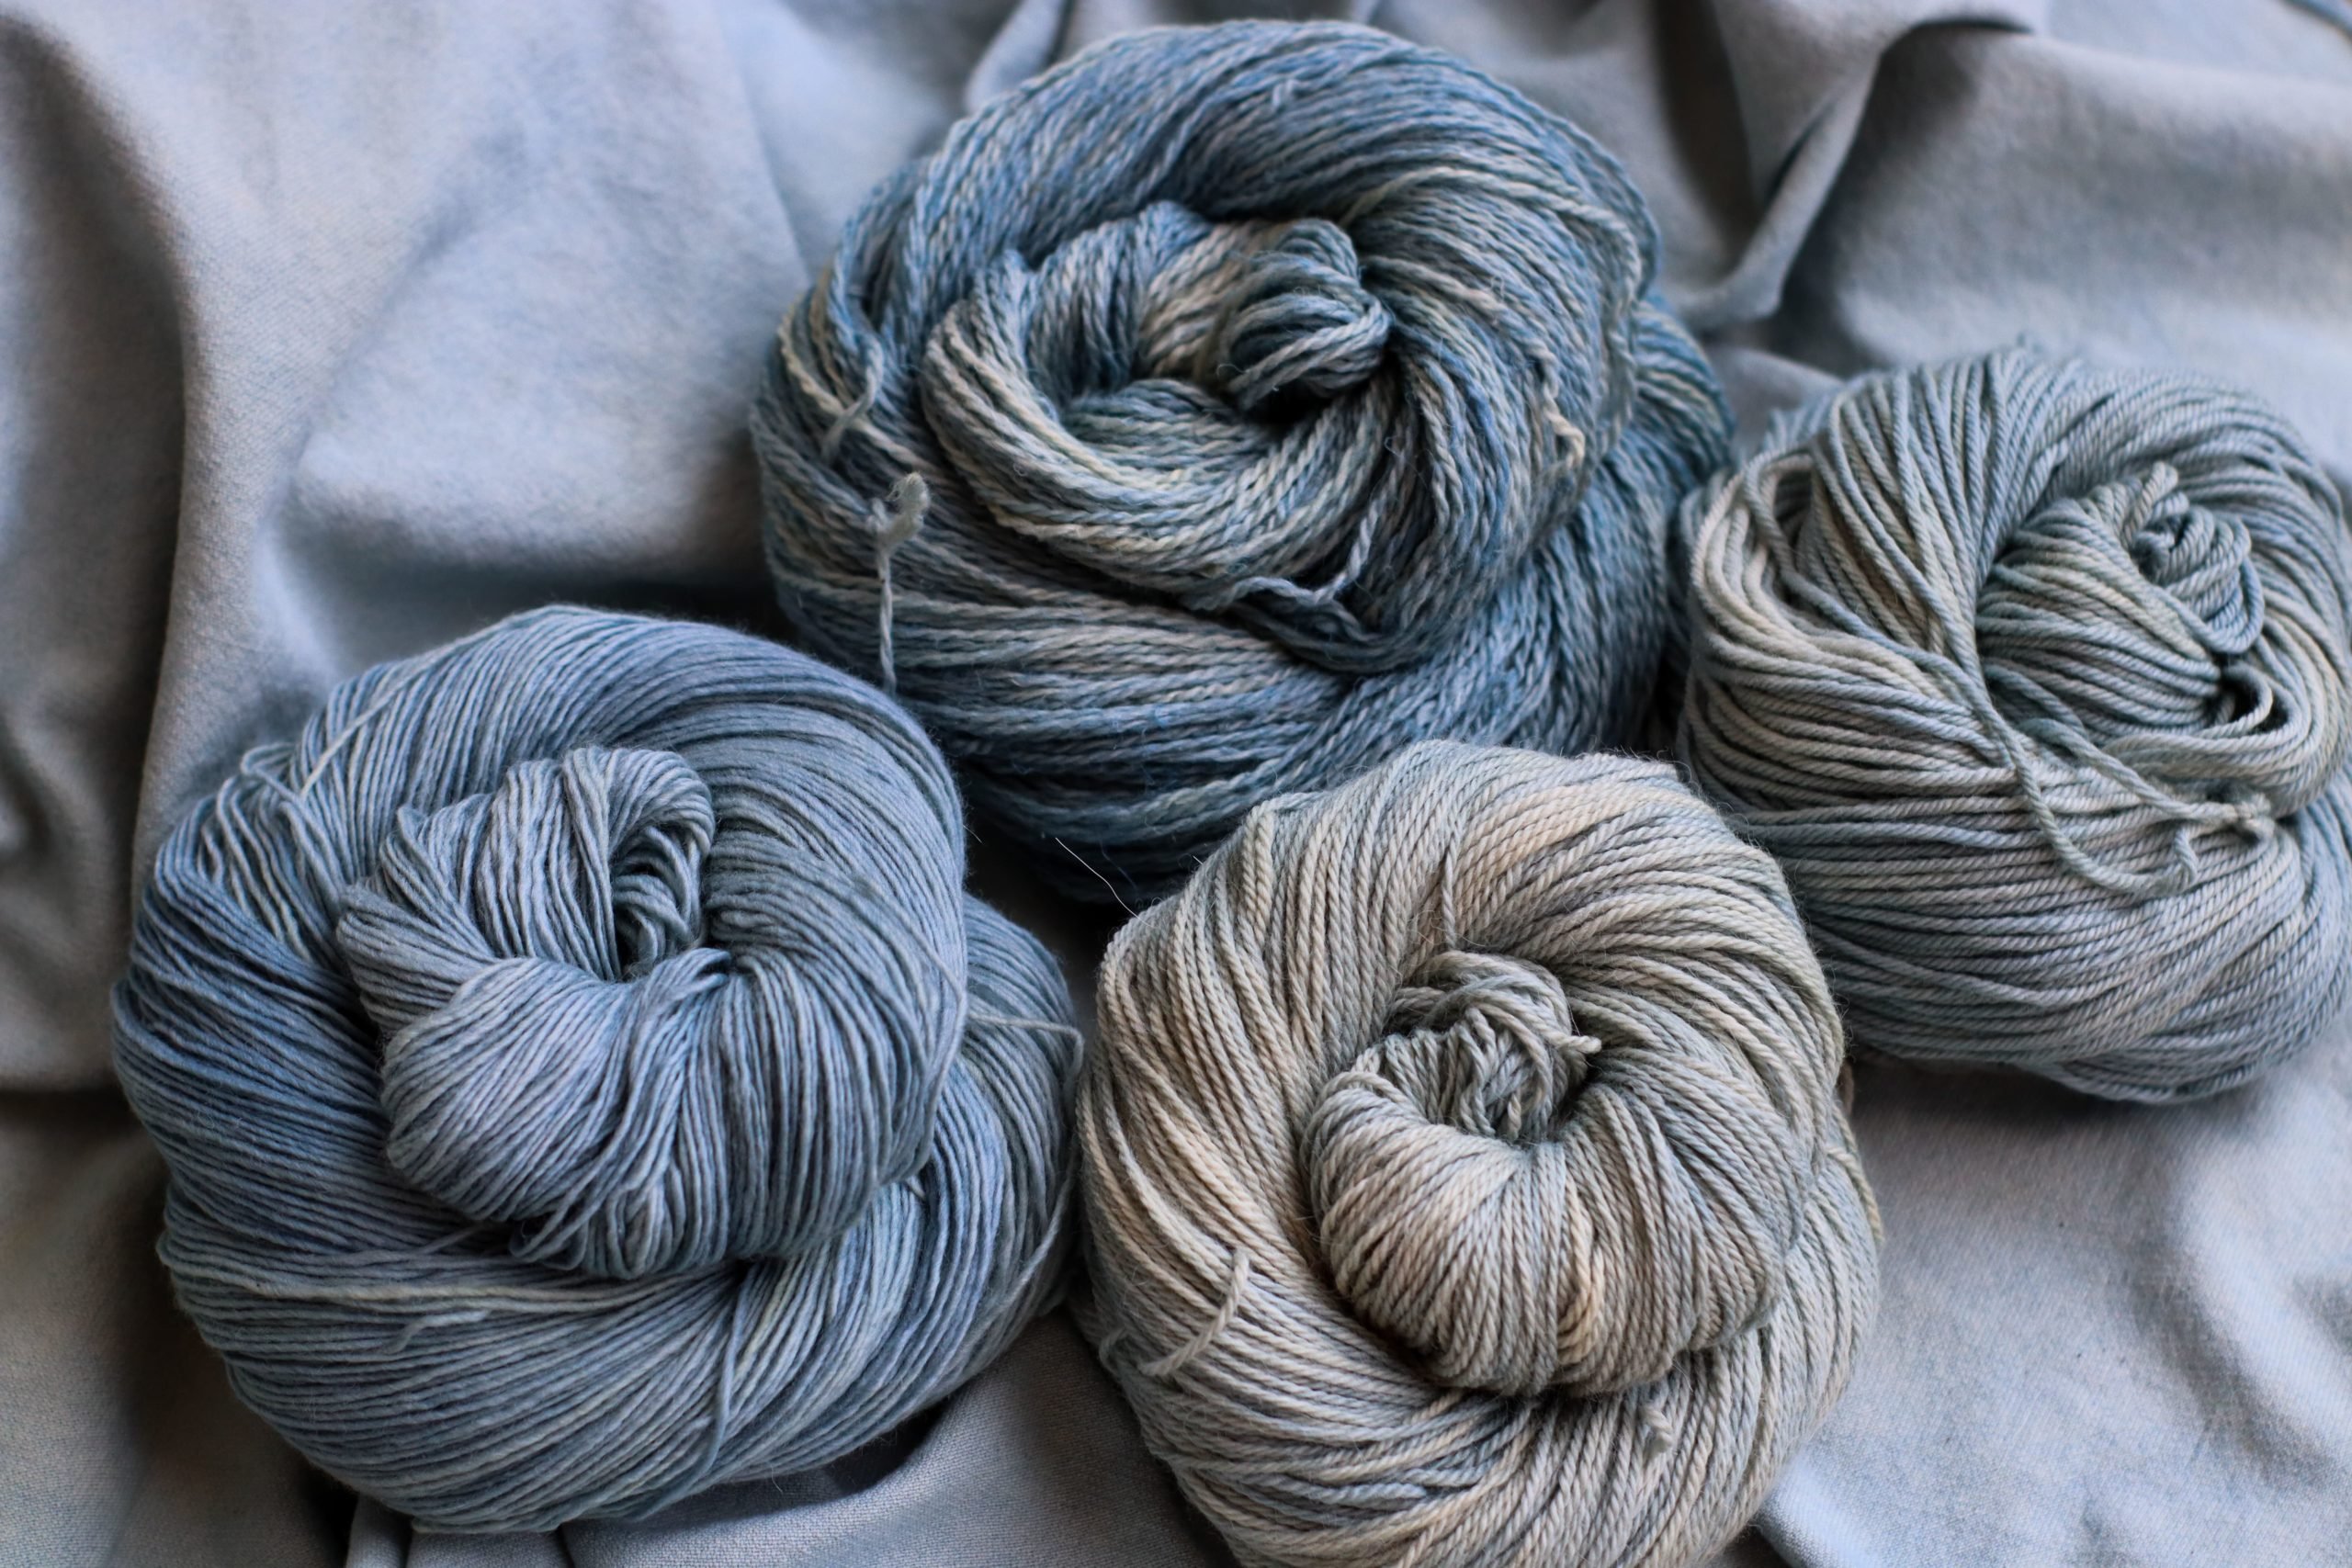
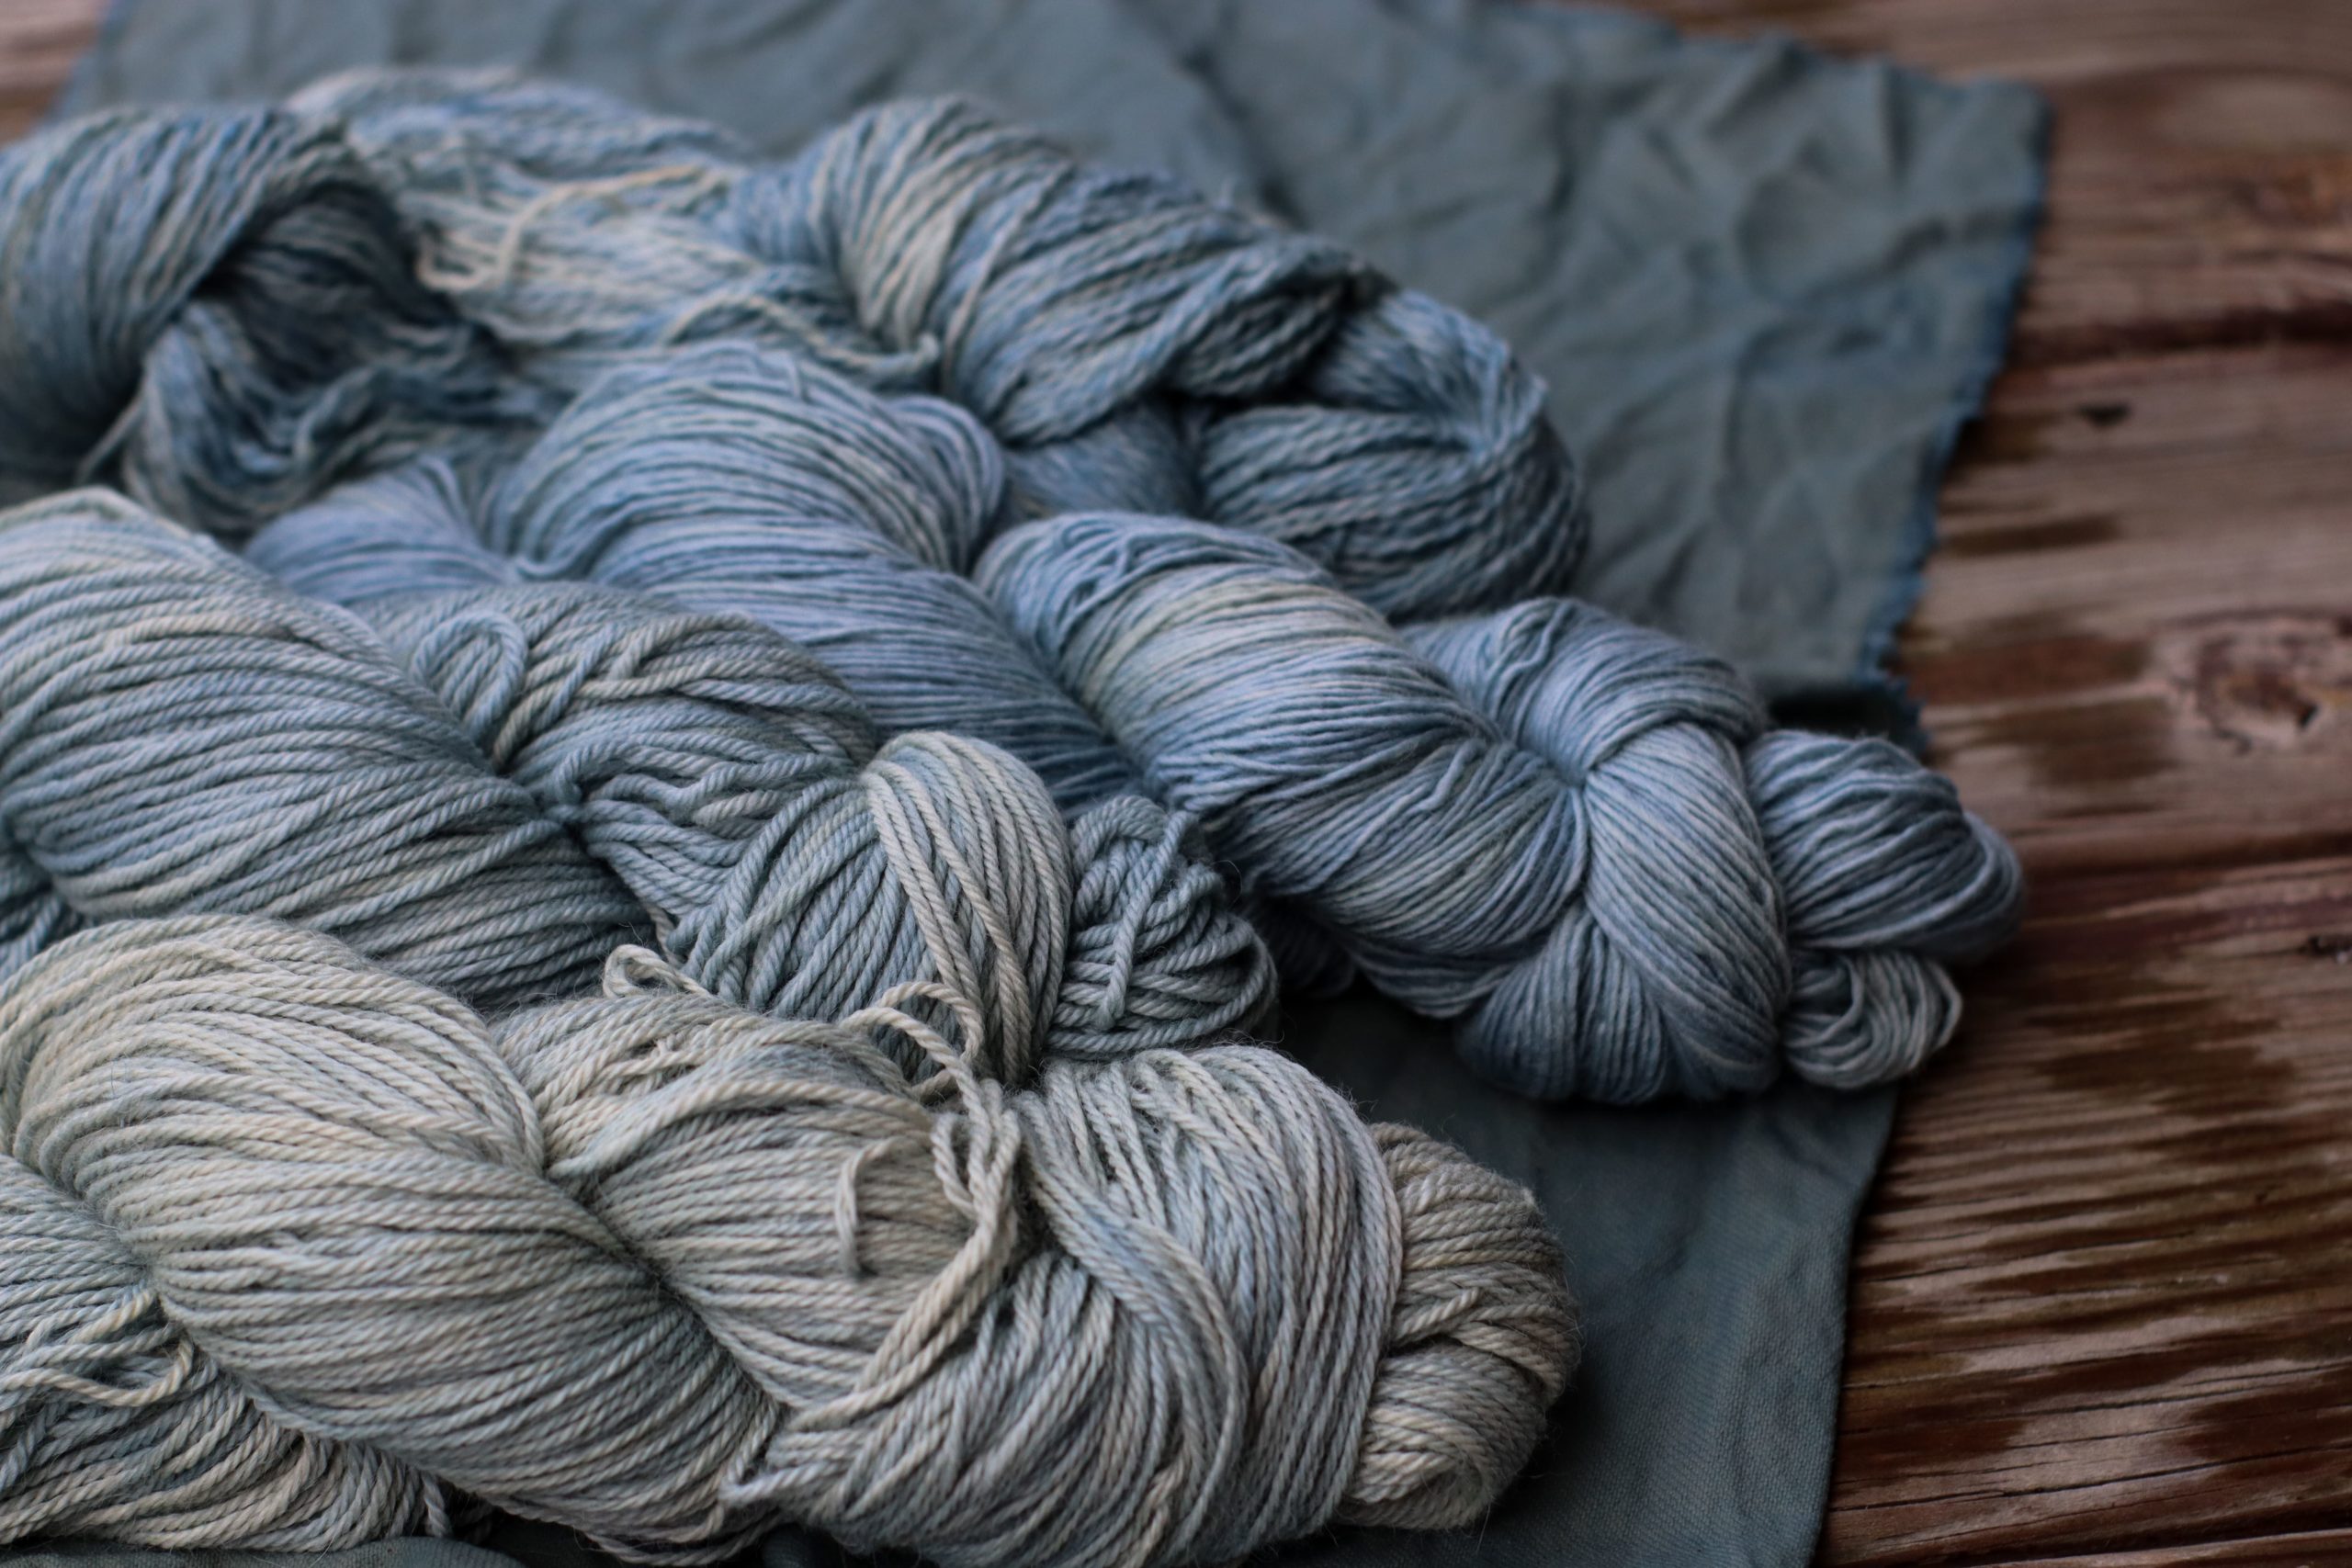
Do a minimum of 3 dips per skein. From that point, it’s up to you how many dips you’d like to do! I did my dips in groups of 3, dipping the lightest skeins only 3 times, and the darkest (medium blue) skeins about 9 times. With the concentration of my bath, I could also choose to dip only three skeins, and could probably get more drastic changes between each, or two for even higher contrast.
After you’re done dipping for the day, or if your indigo vat has cooled or exhausted and you stop seeing colors change, hang up all your yarns to fully oxidize. Give them at least a few hours before moving to the next step. If you will be disposing of your indigo vat, this is a good time to clean it up (see Step 13).
At first, your yarns might look a little more dull than you expected. The rinsing stage does wonders to transform dusty blues into brighter ones! Use fresh water and gently rinse your yarns until the rinse water bath is clear (you’ll see murky, cloudy water until you hit that point). Do a final rinse with some wool wash, then hang to dry.
If you’ve got a place where you can store your indigo vat with a lid and it will not freeze, you can save it and revive it for future dyeing by adding indigo and the other ingredients, and re-heating and balancing the vat (see next step). If you need to clean up your indigo bath, it’s easy to to do: add ½ cup of white vinegar to the vat, then stir and pour the liquid down the drain, scraping the grainy stuff at the bottom into the trash or adding it to your compost pile for more acidic garden soil. Wash your buckets and tools with soapy water.
If you’ve stored your indigo vat for future use, you can re-heat it, stir, and let it settle. Evaluate what the vat needs based on how the liquid appears. If the vat liquid won’t turn yellow or gold, stir and try to settle it again, scraping the stuff off the bottom to make sure it’s being reincorporated. If the vat liquid looks blue, add more fructose (a tablespoon at a time). If you know the vat is weak, you can also add more indigo, fructose, and calcium hydroxide using the 1-2-3 measurements you used before–just stir to incorporate and let it set the same way you did the first time out.
I saved my vat and will definitely be trying indigo dyeing again, and in the meantime will be reading and learning about how to get even deeper, richer results with future attempts!


Well done, Hannah! The only thing I’d add for your readers is to add Synthrapol to the rinse water as well. I also add a glug of vinegar to condition the fiber when rinsing. I do this for all my naturally-dyed colorways. Who’d think those pretty plants can be harsh to the fiber?
That’s a good reminder, thank you, Monica! It’s always surprising to find out that (some) plants can be so harsh, and sometimes chemically derived products can be so gentle.