
How to Develop Variegated Yarn for Garments
Finally. Finally. It’s sweater weather.
As a dyer, an area of the indie dyeing that I feel has been neglected is garment-minded variegated colorways. Of course the patterns are there, and of course you can knit any garment in any yarn and colorway you’d like. But I often find that when I’m scrolling through Instagram, or digging through project listings on Ravelry, that while solids and tonals are almost always a safe choice for garment knitting, variegated colorways vary widely in their success when transferred from skein to sweater.
When I’m shopping for my own sweaters, I rarely reach for variegated yarn. Pooling is always a risk, and one that is virtually impossible to predict. And while skeins with large sections of contrasting colors make for beautiful, vibrant yarn on the shelf, they can translate into a confusing garment that loses its silhouette to color chaos.
Let me take a moment to say that if you like pooling and color chaos in your garments, that’s wonderful! We should all be dyeing and using yarn that makes us happy, and this is in no way a critique of your choice to make vibrant and colorful garments. But if you’re like me, and have knitted a garment in a variegated yarn that you loved in the skein, only to find that you’re unhappy with it in your finished project, read on. I’m going to talk you through a few tricks I’ve developed for creating variegated colorways that knit up into colorful and cohesive garments.
My four rules for dyeing variegated yarn for garments are as follows:
- Avoid Complimentary Colors (this is the most crucial!)
- Pick 3 Main Hues (analogous colors or split complementary colors are a good place to start)
- Apply Dye in Small Sections (about 3 inches or smaller)
- Flip and Repeat Until Skeins are Fully Dyed
To save you some reading (and because I’m terrified of coming off like a rambling recipe blogger), I’m going to dive right into how I dyed these lovely skeins of Yasmin. However, if you’re the sort of person who needs to know all of the details, fear not! I’m the same way, so I’ll include a perhaps over-detailed description of the thought behind these guidelines at the end. For now, let’s get on with the dyeing!
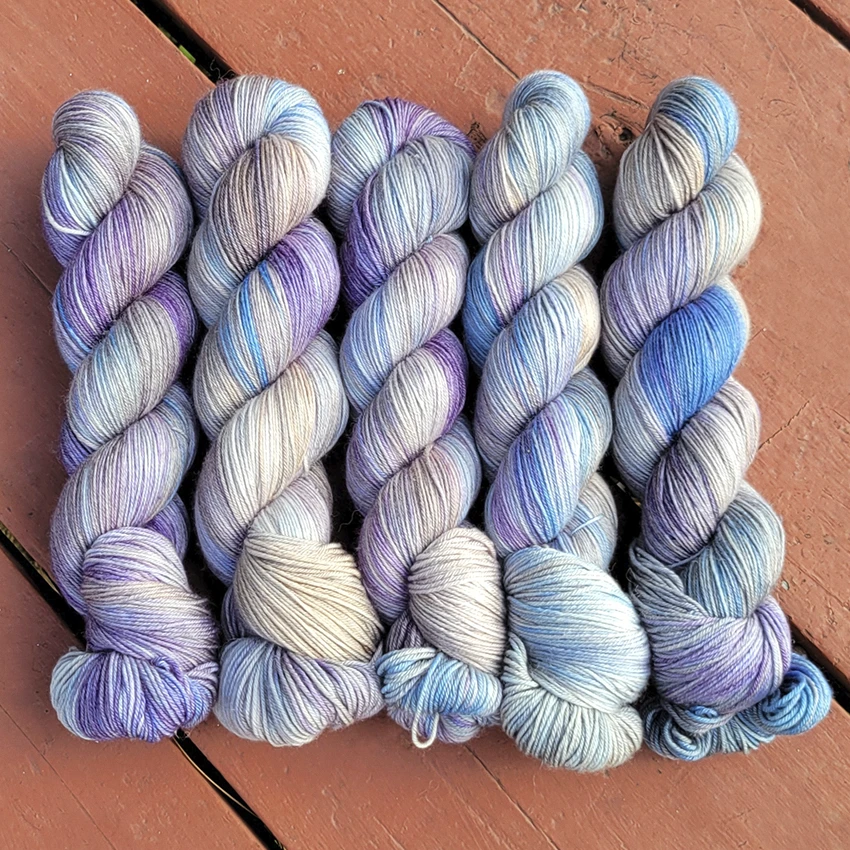
Yasmin is a luxurious blend of 80% extrafine superwash merino wool, 10% white yak, and 10% mulberry silk. With gorgeous luster and soft halo of yak fluff, Yasmin is the perfect yarn for a drapey, light-but-warm layering piece, be it a next-to-skin top, a large wrap-around shawl, or a cozy turtleneck to wear under a flannel or jean jacket while standing around the bonfire. This white Yasmin is perfect for the pale, cloudy, rainshower colorway I’ve dyed here, but if you prefer something with more depth and tonality, you could give Yasmin (Grey) a try! It’s just as buttery soft as standard Yasmin, and gets its color from undyed grey yak fiber. Overdyeing naturally colored fibers generally results in deeper, warmer hues, and tones that shift with the highlights and lowlights of the natural fiber – all of which make for excellent fall and winter colorways.
Materials
- 5 skeins Knomad Yasmin Fingering
- 1 x 4” full hotel pan (also called chafing dishes)
- 1 x dedicated dye tongs
- 1 x dedicated dye spoon
- Gloves – one pair of rubber or two pairs disposable
- 1 x particulate mask (a respirator is preferable if available, but a disposable mask will do)
- 5 x black zip ties (or your preferred skein management tool)
- 5 x dedicated dye mixing containers (you’ll want to be able to accommodate 24oz of water and still be able to move and pour your dye without spilling. I use 32oz paint mixing containers, they’re about a dollar each at the hardware store.)
- Gram scale
- Dharma Acid Dye #427 Sand Dune
- Dharma Acid Dye #429 Alpine Blue
- Dharma Acid Dye #431 Lilac
- Dharma Acid Dye #435 Soft Tan
- Dharma Acid Dye #484 Platinum
- White Vinegar or Citric Acid
- Wool wash or dish soap
- OPTIONAL: Hotel pan lids (you can get by without them, just keep an eye on your water level and be prepared for your kitchen to get humid!)
- OPTIONAL: 1 or 2 dedicated dye buckets for soaking and washing
- OPTIONAL: Dye rags – you won’t see them in these instructions, but they’re good to have on hand!
Dye Set-up
Needed: 5 dye containers, dye spoon, scale, Dharma Acid Dyes
- Put on a pair of clean gloves and a particulate mask.
- Measure the following dye quantities in each of your five dye containers, add about 8oz of very hot water, and stir vigorously.
-
- Dharma Acid Dye #427 Sand Dune: 3g
- Dharma Acid Dye #429 Alpine Blue: 1.5 g
- Dharma Acid Dye #431 Lilac: 2g
- Dharma Acid Dye #435 Soft Tan: 3g
- Dharma Acid Dye #484 Platinum: 4g
- You may remove your gloves and mask after you have finished handling and mixing your dyes.
- PRO TIP: Allow your dye solutions to sit for AT LEAST ONE HOUR, ideally two or three. I cannot stress enough how much this helps with even dye uptake. It gives those dye particles extra time to dissolve and really become a homogenous dye solution that will not break. This is especially important when using blue and purple pigments, as we are here.
Okay, let me take a quick second to say, I hear you. I hear you saying, “but Henry, rule number two is to pick just three hues!” You are correct. The pigments we’re working with here are a purple, a purple-y blue, a warm tan (most browns fall under orange on the color wheel), a cool tan, and a gray. So our hues are blue/purple (represented by Alpine Blue and Lilac), an orangy-yellow (represented by Soft Tan and Sand Dune), and gray. We’ve deviated from the starting point of 3 hues, but that’s okay! It’s a starting point, and rules are made to be broken. I’m confident that these three neutrals and two strong hues will come together well.
Prep
Needed: yarn, zip ties, vinegar or citric acid
Optional: presoak bucket
- Carefully remove the tags from your Yasmin skeins. Don’t cut your ties by accident! It’s possible that I’m speaking from experience here, hehe.
- Open your skeins and secure a zip tie (or your preferred skein management tool) as loosely as possible around each skein. PRO TIP: Choose black or colored zip ties over clear or white. They will be easier to spot in the dye pans; clear and white will pick up the dye color and blend in.
- Presoak your bare yarn in cool to lukewarm water and around 1.5 cups of vinegar or half a cup of citric acid for twenty minutes to an hour. The added acid is going to help your acid dyes strike faster, which will prevent them from mixing and getting muddled in the pan. I usually soak my yarn in a bucket in the bathtub, but you could also use your sink if you’re using vinegar.
Dyeing
Needed: 4” hotel pan and lid, spoon, tongs, dye solutions, yarn, soap
Optional: wash and rinse buckets
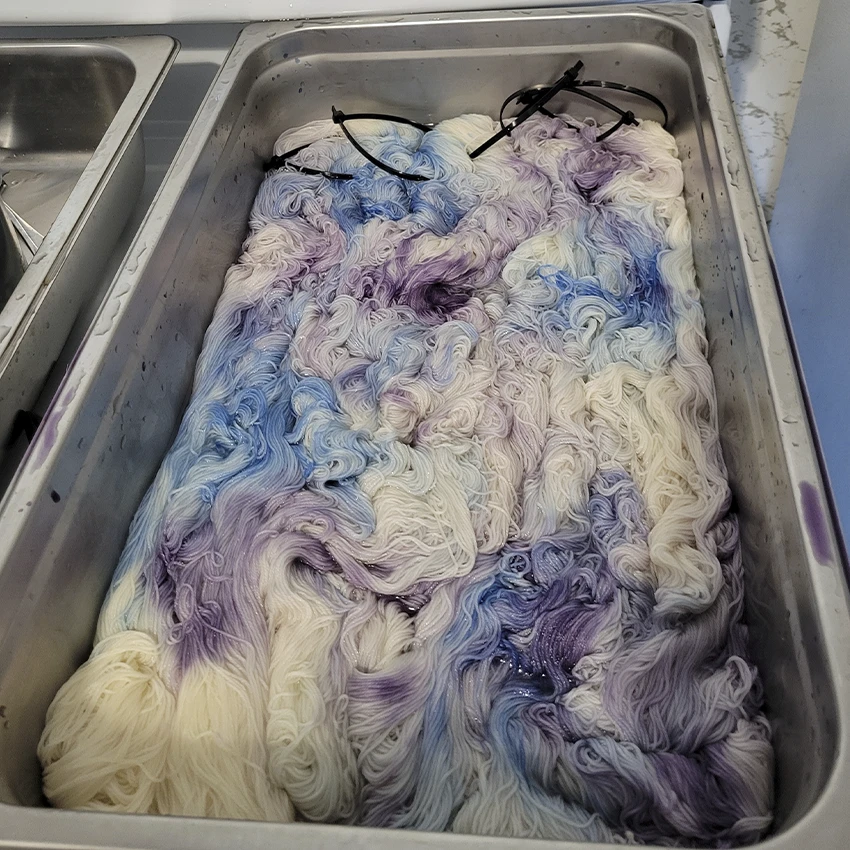
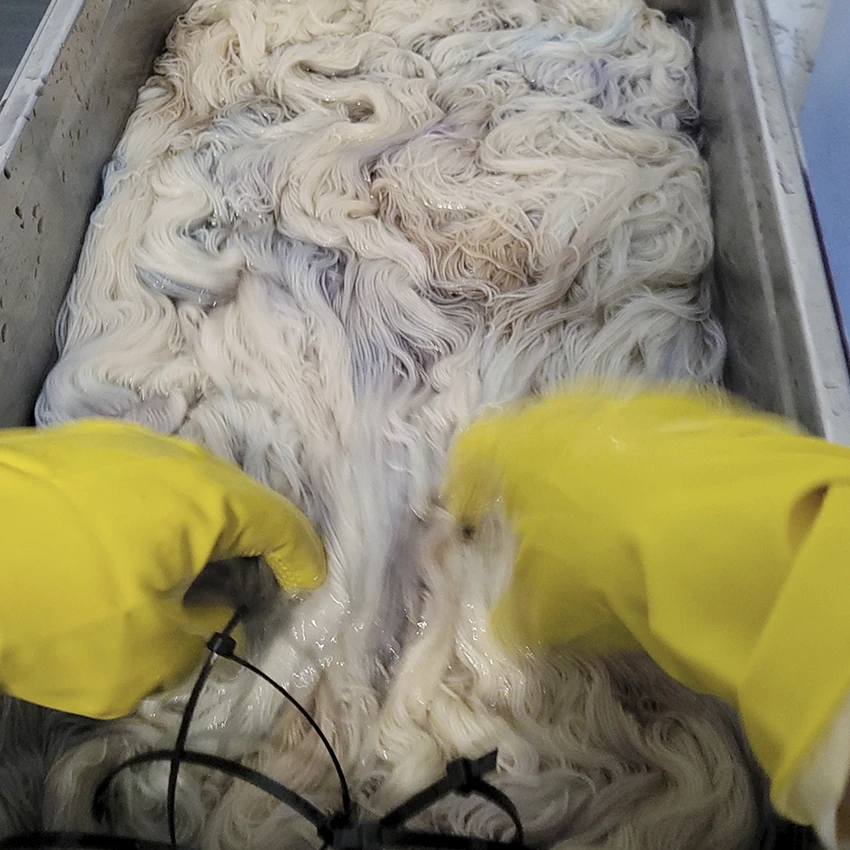
- Set your hotel pan on the stove and add a scant inch or so of water. You only need enough at this stage to make it easy to swish your yarn around in the pan. Lay your five skeins of Yasmin in the pan lengthwise, and arrange them in the pan so that they sit fairly evenly.
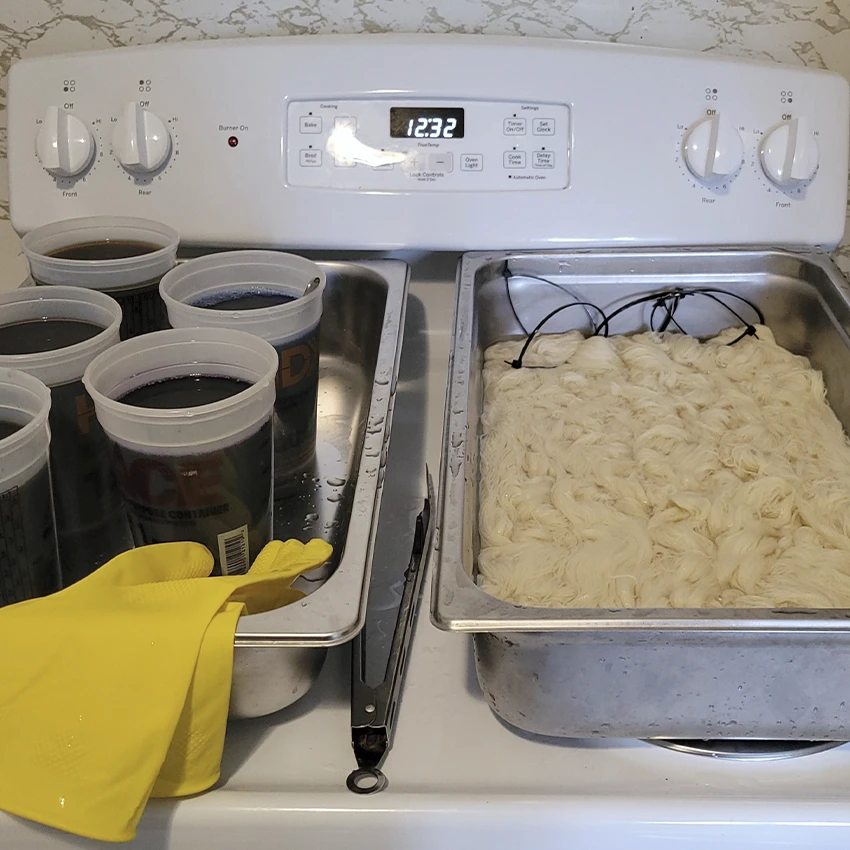
- Put on a pair of clean gloves and a particulate mask or respirator.
- Retrieve your acid dye solutions. Add another 16ooz or so of water, so you now have about 24oz (or three cups) of liquid.
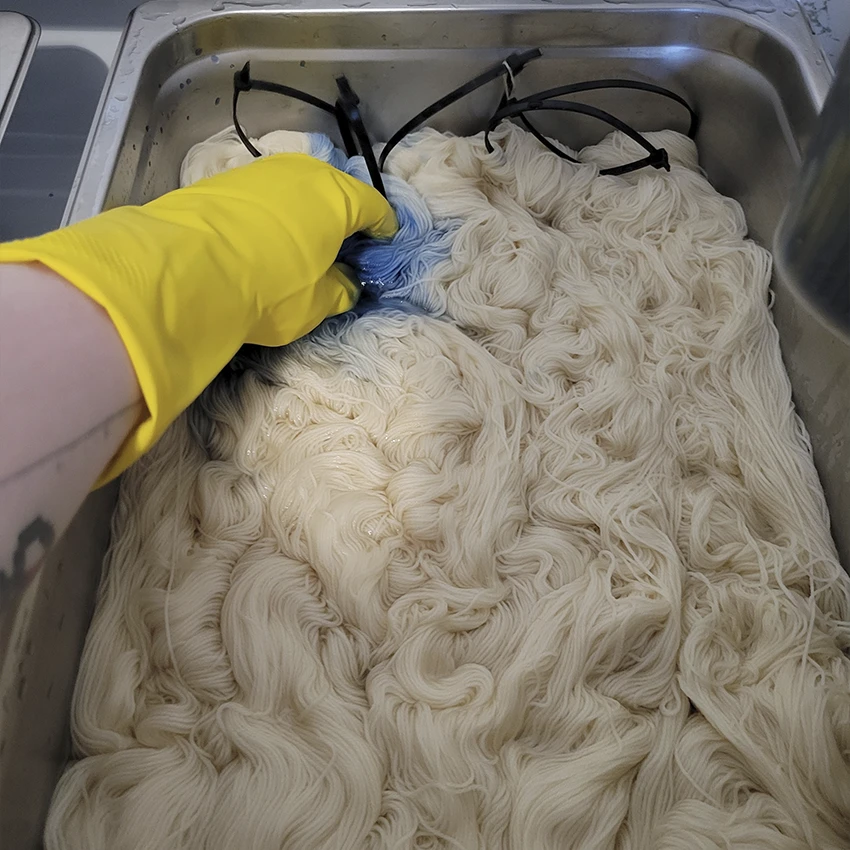
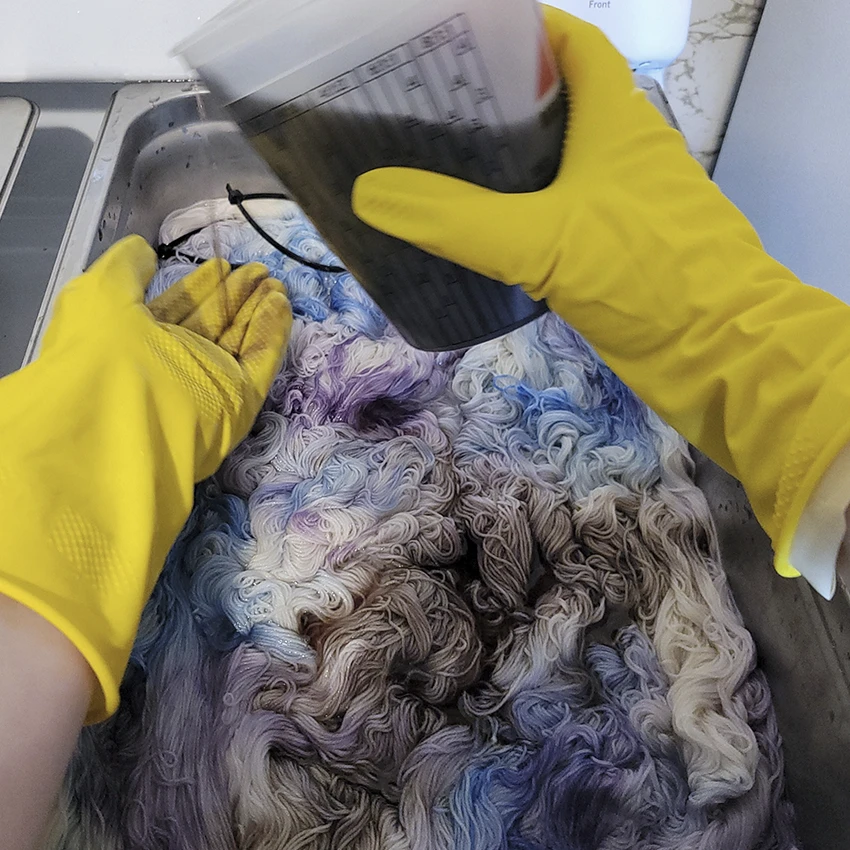
- Starting with Alpine Blue (or your brightest color), pour your dye solution one or two tablespoons at a time in four to six different places over your yarn. You’ll see in the photos below that I’m pouring the dye over my gloved hand. I use this technique when I want my finished skein to have a washed, watercolor-y look. First I pour one or two tablespoons of dye over my hand, allowing it to flow between my fingers, and then I use my gloved hand to agitate the area where I’ve just poured dye, in order to expose as much bare yarn to the dye as possible. Save at least half of the dye solution to use on the other side.

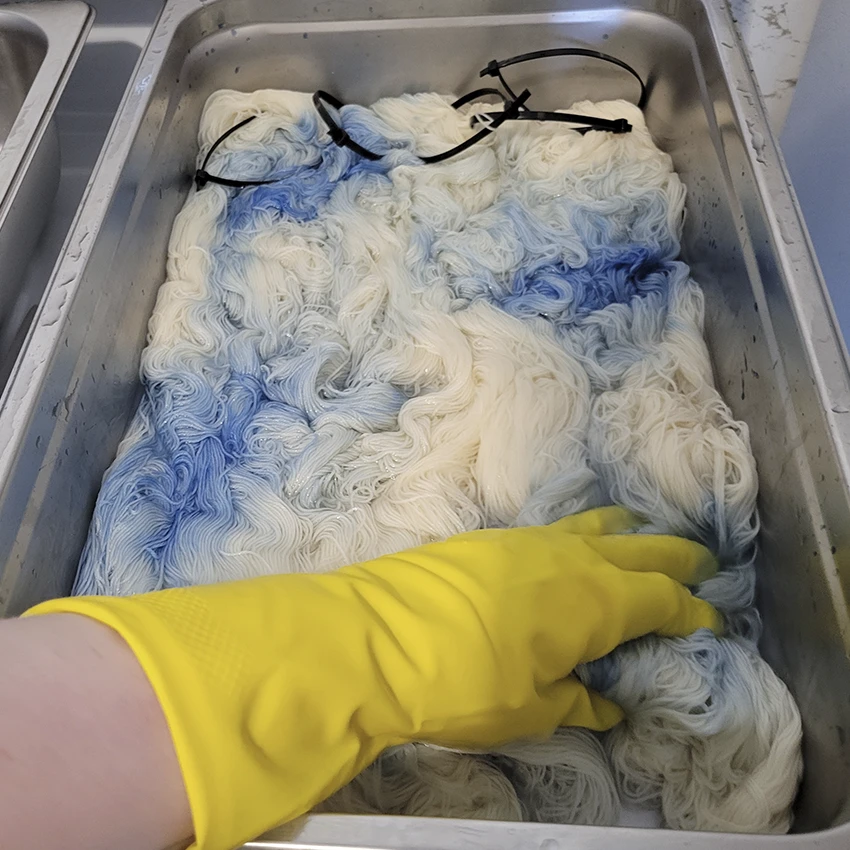
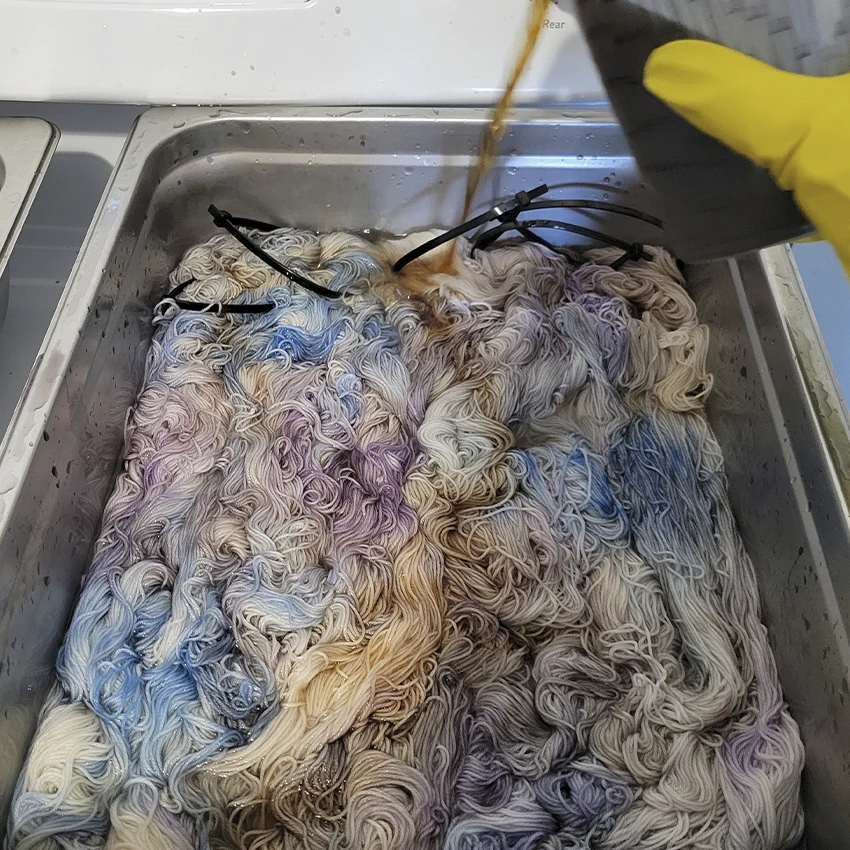
- Repeat the previous step with the Lilac dye solution, and then add the three remaining colors in whatever order you like. Try to arrange the dye in a way that distributes color fairly evenly between skeins – i.e., make sure each skein has about the same number of blue, purple, brown, and gray spots. As you’re pouring, it helps to picture your dye pan as though it’s divided into five even sections, and to try to create your color pockets in areas where the skeins are touching.
- Allow your yarn to sit for about 15 minutes, then check your pan for dye exhaustion. If your water is not clearing, you may have to heat set your yarn before flipping.
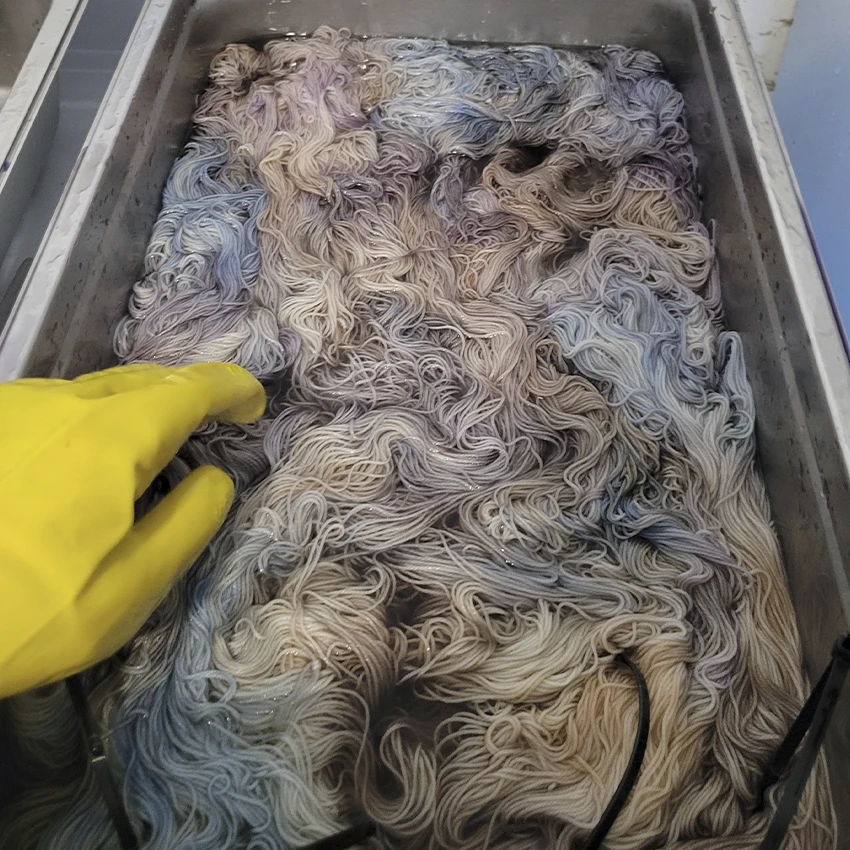
- Flip your yarn and spread it evenly throughout the pan, ensuring that as much undyed yarn is exposed as possible. Repeat the previous three steps. If there are areas on the back side where color comes through, pour the corresponding dye in those areas (blue on blue, etc) to keep the colors from getting muddled.
- You may wish to flip and dye your yarn a third time, as I did. Use your gloved hands to ensure that undyed areas are facing up.
- Cover your pan and set over low heat – on my stove, I start at 2 out of 10. Remember that we’re using low immersion here, so your pan is going to heat up quickly. You’ll want to turn the heat down as far as you can once you start to see steam. PRO TIP: In the beginning heating phase, it’s a good idea to periodically give the water a swish to ensure even heat distribution. You can use your tongs or spoon for this, but I often will just lift a corner of the pan about an inch and set it back down, as this is enough to set the water moving in the pan.
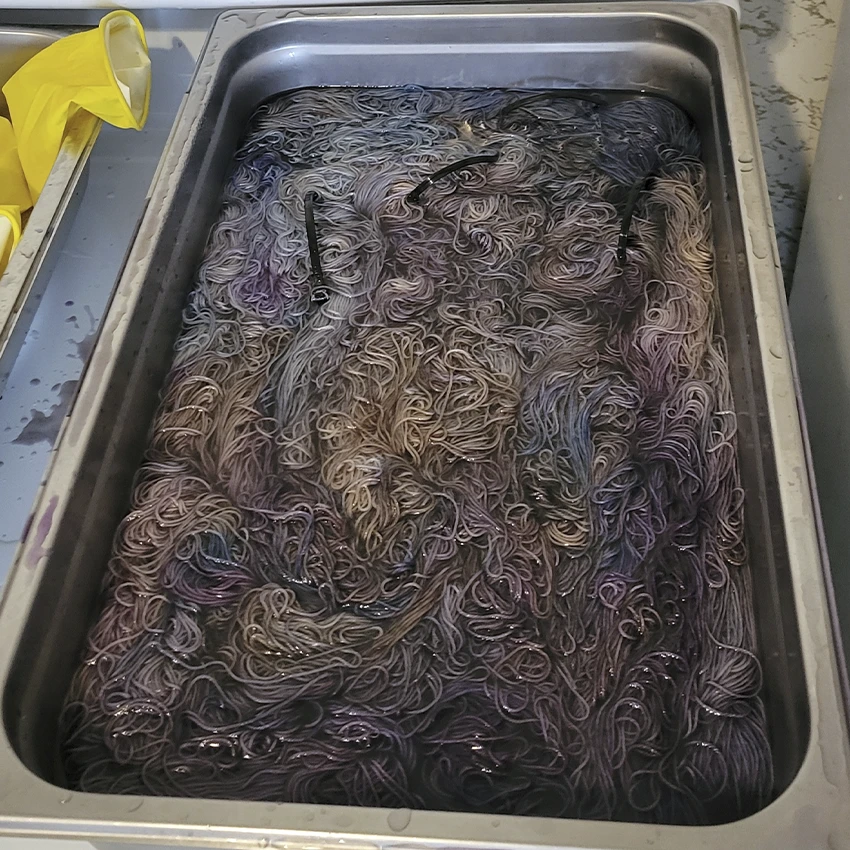
- Allow the pan to heat at a bare simmer for an hour or so, without allowing it to bubble, until the water is mostly if not completely clear. You may have to add vinegar or citric acid in order to clear the water. Add a little at a time, half cup increments for vinegar and tablespoon increments for citric acid, being sure to stir gently in order to distribute evenly through the pan.
- Allow your yarn to cool fully, or if you’re impatient, at least to a comfortable handling temperature.
- Wash in hot but not scalding water with wool wash or teaspoon or so of dish soap, and rinse in water that is at least warm so as not to shock your yarn. Squeeze your skeins dry, twisting them as little as possible to do so. You may choose to roll them in a towel as with wet blocking, or spin dry them in a salad spinner or your washing machine.
- Give the skeins a good thwack if you like. I personally don’t do this on my own yarn, as it can lessen the elasticity a bit, but it does help the yarn hang nice and straight as it dries.
- Hang your skeins to dry where they can be spaced evenly apart and air can move around them easily, such as on a coat hanger over your shower rod. You can put a fan on them if you’d like to speed up the process a bit.
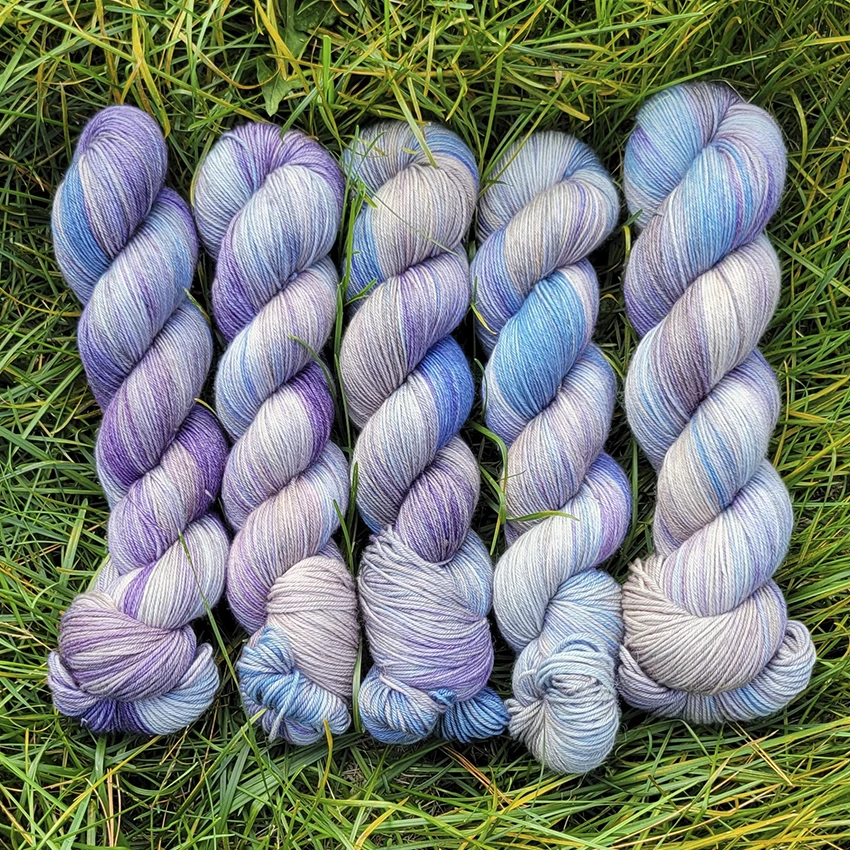
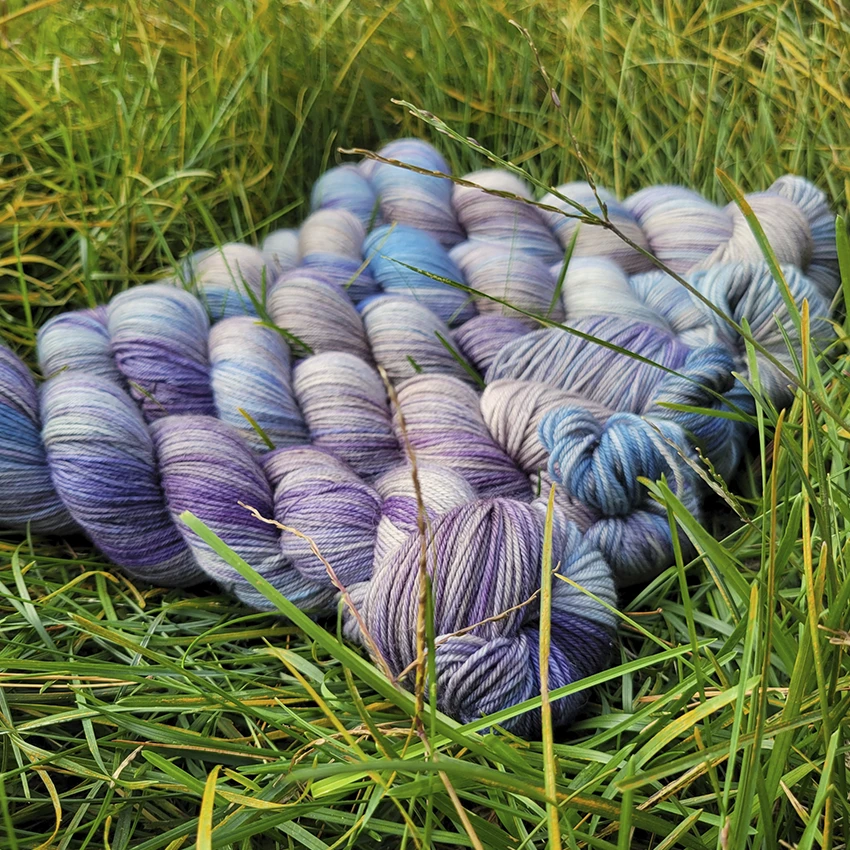
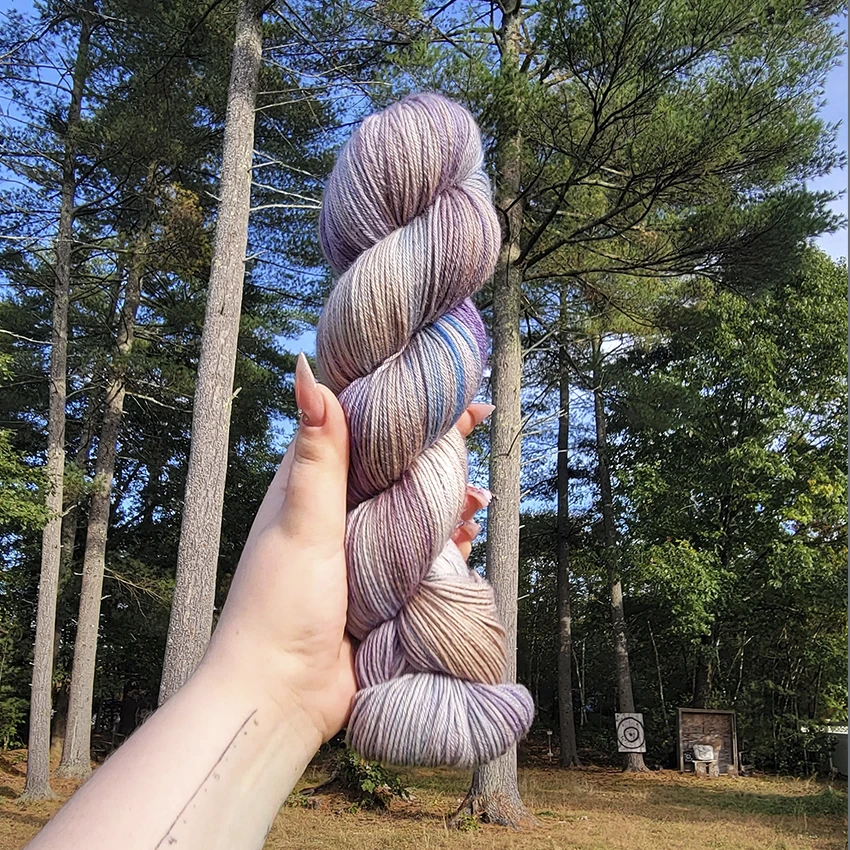
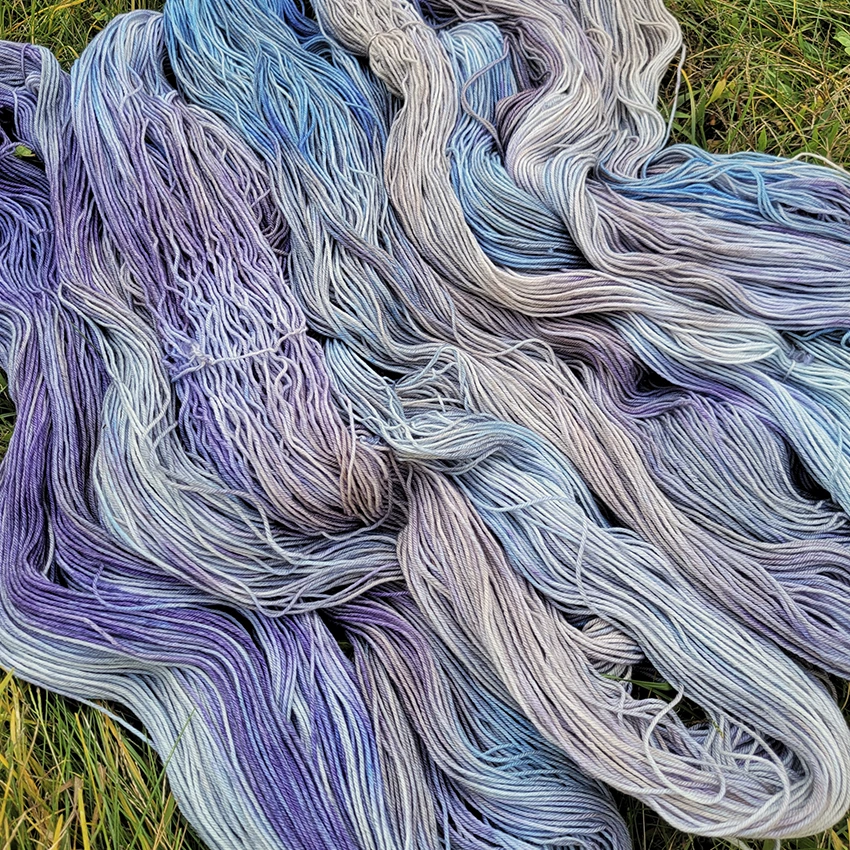
Voila! I’m so pleased with how these turned out in the end, and I know they’ll knit up into a gorgeous sweater. If you stuck around to hear the thought (and amateur science) behind my variegated rules, read on!
Rule no. 1: Avoid Complementary Colors
Complementary colors are any two hues that sit opposite of each other on the color wheel. Ordinarily I think complementary colors go great together, and make for a wonderful variegated hat or pair of socks. But when it comes to garments, I find that complimentary colors can obscure the silhouette of the garment, and cause visual distortions that disrupt our perceptions of the body.
This is due to how the human eye perceives color. The eye will always do its best to balance the way it receives light, in order to maximize your visible range and ensure that you can see everything in front of you, and not just the brightest or most prominent color. If you want to see what I mean, pin a piece of red paper or fabric to a white wall, and look at the red for several seconds. When you change your focus to the white wall, you’ll notice that it looks slightly green. This is because when your eye was so focused on the red paper, it was also funneling energy away from your red cones and into your green cones, to strengthen your ability to see movement or sudden changes in the still, red object in front of you. This phenomenon is why wavy checkers and stripes can be difficult to look at, or make you dizzy; your eye is struggling to balance the opposing colors; and, why color pooling in variegated garments can overshadow the silhouette or distort the shape of the body underneath.
When conceptualizing multicolors, the tool I go back to again and again is my Dharma Trading color chart. It’s a poster, it’s a few dollars, and it shows most of the colors Dharma offers in acid dyes. It’s worth noting that these colors are displayed as if they were dyed on silk, so if you’re dyeing a primarily wool base, your end color may be a little different (in my experience, typically this means the colors are more saturated than they look on the poster), but it gives you a good idea of the color temperature and undertones, which is of greater importance than saturation when it comes to developing a colorway.
So again, avoid skeins that feature complementary colors. They look wonderful in the skein, but the potential for unplanned optical illusion isn’t worth it, at least for me.
Rule no. 2: Pick Three Hues
I almost always start my variegated colorways by picking 3 colors that I want to feature. I may adjust from there, but it gives me a good starting point. Typically, I choose either analogous colors, or the 3 colors closest to each other on the color wheel, if I want a very cohesive, almost tonal look, or split complementary colors, a color and the two colors that surround its complement on the color wheel. Using split complementary colors can mimic the visual excitement and contrast of regular complimentary colors, without much risk of knitting up into a magic eye poster at the end.
If you’d prefer to jump off of the color wheel and pick your own colors, or if you intend to dye protein yarns with any regularity, I highly recommend picking up a Dharma Acid Dye Poster on the Dharma website. It’s listed for $1.99 plus shipping, and I start every single dye project I do by opening up my poster and tacking it up on the wall in front of me. The color samples are shown as they appear on silk, so there will be differences in how they take up on wool (mainly, in my experience, dyeing wool requires less dye and can sometimes result into more depth of color than on silk, as is the case with Alpine Blue and Lilac), but it’s an extremely helpful tool in determining what colors will work together, or what two dyes to mix to get the a perfect shade with the right undertones. You can also pick up a color wheel on their site, or find one at your local art supply store.
Rule no. 3: Apply Dye in Small Sections
When applying dye to the skeins, it’s important to keep those areas of dye fairly small. If you can limit a color zone to only a few inches in diameter, that translates to only a few stitches, usually no more than five or six. Keeping your color sections small like this lowers the likelihood that those stitches will stack up together and cause pooling in your finished garment.
Rule no. 4: Flip Your Skeins
After applying dye to one area (and setting if necessary), flip and dye your skeins as many times as you need to in order to ensure that there are small sections of color covering the entire skein. It’s okay if you’re utilizing the bare yarn color in your variegated colorway, but make sure those peeks through are intentional and small. Long sections of undyed yarn are likely to cause pooling in your garment.


